FENCE-MOUNTED PLANT CONTAINER SHELVING.
This plant container shelf system uses the strength of the fence (including fence rails and fence posts) to support gallon-sized plant containers. It has several advantages. This system foils our Northwest slugs who cannot find their way up to the plant shelving. This system does not use up any precious ground planting space. And the container plants get plenty of air circulation, thus promoting healthy living conditions.
First, I assume that all fence rails have been installed vertically (that is, the nominal 4 inch portion of the 2 by 4 rail is mounted vertically), using fence clips to attach them to the fence posts. Otherwise, you'll have to adapt to your current fence system.
The "support system" consists of several wood Rail Supports (minimum spacing of the rail supports is 3 feet apart). The Rail Supports in turn support the Shelf Brackets. The length of each rail support is determined by the spacing between the existing fence rails. Each Rail Support is notched to fit over the fence rails and end up being flush with the fence boards. The Rail Supports are fastened to the fence rails with 3-inch decking screws.
The shelf Support Brackets are scrap pieces of 2 by 4 cut to the width of the desired shelving. These are fastened to the Rail Supports with decking screws.
The "shelves" are lengths of lath loosely resting on the Support Brackets. The weight of the plant containers holds the lath strips in place. You could also use a couple of 1 by 4's, or 2 by 4's for the shelves. The Support Brackets will hold a lot of weight, so use 2 by 4's or larger stock.
 Sketch of a fence 'rail support' and 'shelf bracket' to hold plant containers
 The completed fence plant container shelving.
 Mounting detail (a Support Bracket is mounted to a rail support)
 Mounting Detail (the Support Bracket on the right is screwed to a fence post)
 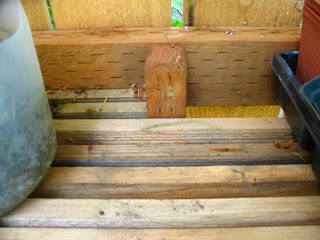 Rail Support board is notched and screwed to fence rails (top and bottom)
HYPERTUFA ITEMS.
I read a book about creating items from hypertufa and decided to try my hand using this medium. I first made a hypertufa planting trough using a cheapo styrofoam cooler for my mold. (The cooler wasn't being used because the lid got crushed. I like to recycle quasi-useful stuff.) I also had some left-over galvanized hardware cloth (1/2-inch by 1/2-inch spacings) that I used as reinforcement. Before applying the 'tufa' mixture to the upside down cooler, I punched two large drainage holes in the styrofoam bottom and made sure there were holes in the hardware cloth at those points. The main advantage of hypertufa is it is comparatively light weight, so moving the completed items is relatively easy. The disadvantages of using hypertufa is the LONG drying time. It will be several days until you can move the project, and a week before you can use it for its intended purpose. You'll also need a pair of tin snips to cut the hardware cloth and gloves for mixing and applying the hypertufa mix. I used wire to hold the metal cloth together in the curves and cut areas. You can use bottle caps to act as spacers between the hardware cloth and the syrofoam ice chest or anything else you may have handy. Just be sure the hardware cloth doesn't show through and that the tufa contacts the styrofoam inside the metal wires. The drawing below shows the process.

Components to create a Hypertufa Trough

Completed Hypertufa Trough with plants.
The photo shows the completed item (one year later). I used the left-over mix to make peek-a-boo 'critter' faces that are placed elsewhere in the garden.
Garden Hypertufa 'critter' with large marble 'eyes'
