Entryways may act as room dividers. For example, an opening in a low hedge to separate a kitchen garden from the flower cutting garden, or an expanse of lawn separating the natural (e.g., wildlife) area from the formal (e.g., dining) area. Other entryways may separate sports courts, sunbathing, shady relaxation, and child play areas, etc.
Entryways may be supplanted by transition areas, in an open garden. Expanses of lawn, low fences, and planting separations (use of borders, berms, shrubs or trees) can also act as transition features.
The construction looks fancy, but isn't. In fact, it is quite simple, the hardest part is digging the six post holes so that they align properly.
Construction details follow:
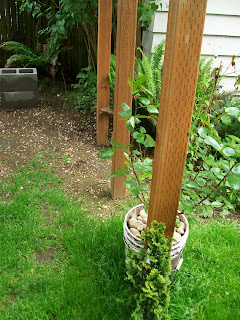
I first dug post holes for the four outside posts and measured the distances between and across from each other before leveling and backfilling with dirt. Next, I placed the intermediate posts between the outside posts and leveled them. I did not pay particular attention to the height of each post because I would deal with that detail later, but each post was sunk approximately 24 inches into the ground.

The posts line up in a row on both sides of the entry arbor.
With the posts (pressure-treated 4 by 4's) aligned in a row and across from one another, I measured their overall out-of-ground lengths and cut another 8-footer to add another 18 inches to the shortest post. This additional piece placed at the top of this post put the total height at 7+ feet. I scabbed a length of scrap to both the post and post extension to temporarily hold the two together.

Post with extension and scab board holding it together.
I did the same for the opposite post, but used my level and measured and cut the extension piece to ensure that the tip tops were level to each other. I continued this process for the other outside posts and their extensions and then measured and cut lengths for the intermediate posts extensions ensuring that they, too, were level with the outside posts. All posts and extensions were temporarily scabbed together and held vertical with scrap wood.
I trimmed the outside main beams (2 by 8's) to match the grape arbor cuts and mounted these beams to each set of three in-line posts. I used three inch decking screws for fastening the beams to the post extensions. Once the outside beams were fastened in place, I attached the inside 2 by 8 main beams in similar fashion ensuring that the ends of all the beams aligned with their post mates.
I then cut both 2 by 4 and 2 by 6 "brackets" to cover the splice points between the posts and their extensions. Each beam bracket extended from the bottom of each beam to approximately 4 to 5 inches below the splice point. These were the 2 by 6's. Again, I used my level to ensure that the bottoms all matched up. I used three inch decking screws for fastening.

Two by sixes "support" the main beams.
With the splices covered, I removed the temporary scab blocks and finished the remaining sides of each post using 2 by 4 brackets to extend to the top of each post and align with the 2 by 6 brackets on the other sides of each post. The only tricky measuring was where the 2 by 4 brackets extended to the top of the beam instead of the bottom of the beam. Each 2 by 4 bracket was individually measured and cut so it met at the same point below the top of the post. This was to ensure that the "top beams" would meet at the tops of these brackets.

Two by fours meet at the top of the post and "support" the ceiling boards.
The top beams consist of untrimmed 2 by 4 by 8-foot long pressure-treated boards lying atop the main beams and these were fastened (in pairs) to both sides of each of the six post tops for a total of six. An additional two sets of pairs were placed between the posts to achieve a fuller look to the "ceiling." These additional pairs will be fastened to scrap 4 by 4 stubs cut to a length long enough to also five surface area to fasten them to the main beams.
The completed Garden Entrance is shown below.

Entry view.

Side view.
